

For several years we’ve had a wet area in a field which we suspect is due to a collapsed clay tile line. My dad had attempted to located the line once before without any luck. Last year I overheard a tip about using satellite photos to locate lines and decided to try to find it again while we were doing some other tiling work. I regret to admit that we were still unable to locate the line in a timely manner and had to move onto other jobs, but I learned a few tips that could be useful in this area.
I’m using the desktop version of Google Earth Pro, which is now free. You can download it here. From what I can tell, the browser version of Earth doesn’t support historical satellite imagery.
Find the Right Year
The most recent year available in a standard Google Maps satellite view may not show you much, but Google Earth allows you to view historical satellite photos from various years and months. After browsing through the available imagery, I discovered that imagery from March 2005 makes lines stand out clearly for my area.
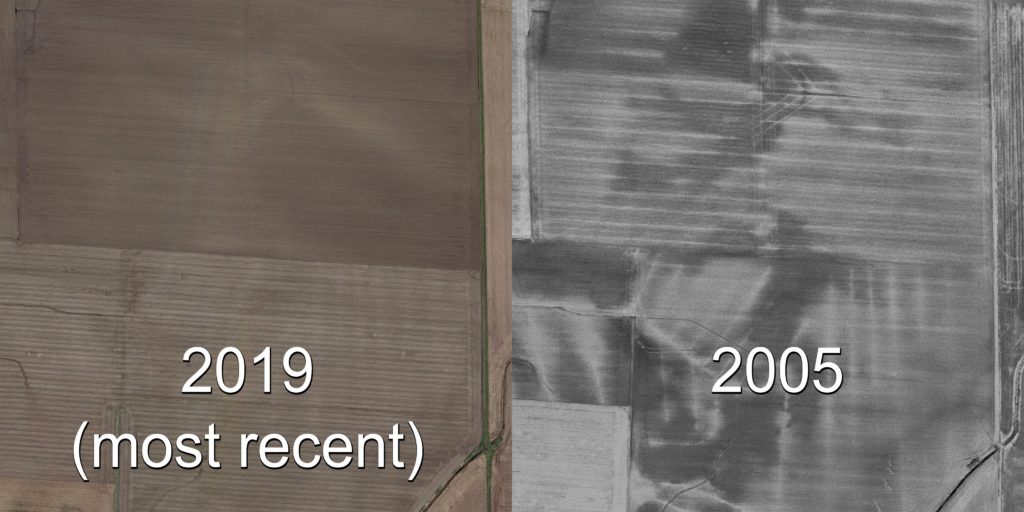
This of course assumes the tile you’re looking for has been there for a couple decades, but presumably you’d have maps for anything done recently.
Translate to a Guidance Display
In some cases, you may be able to just measure in from a field boundary or a fixed object on the map and use that to locate the line in person with a tape measure. If that won’t work, the following steps outline how to translate what you see in Google Earth to lines on your guidance display.
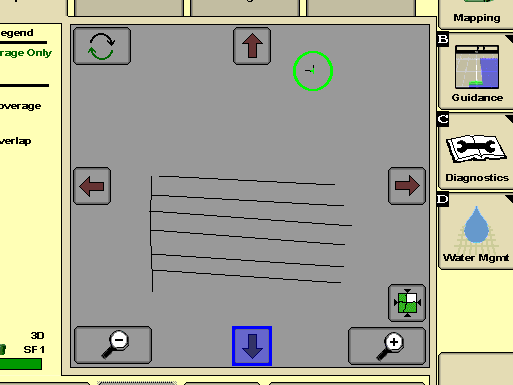
Overlay measuring lines
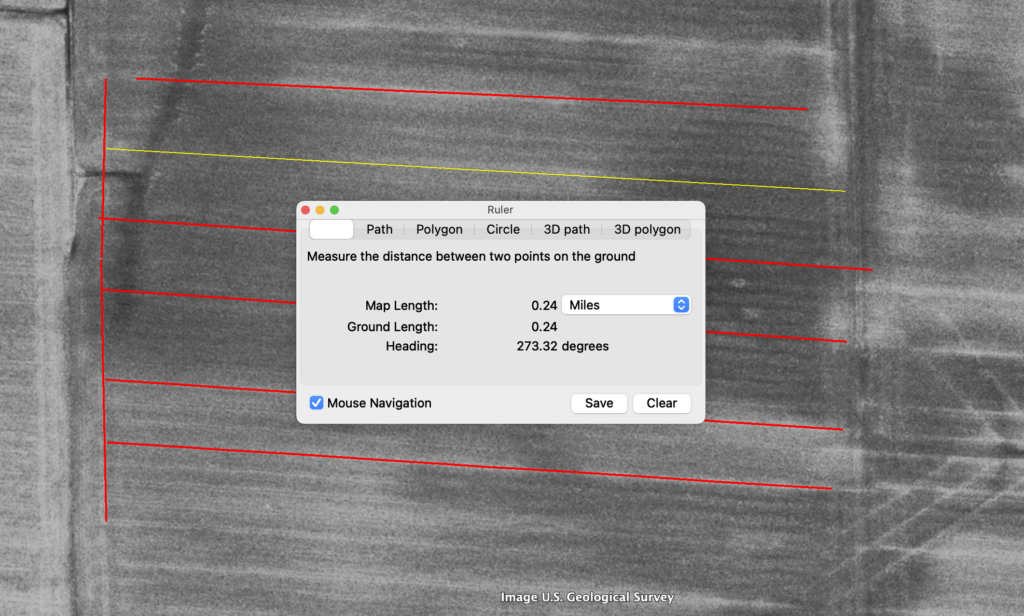
Using the ruler tool in Google Earth, lay down measure lines on the tile lines. You can squint, zoom in and out, and play with the A/B points until you have it centered to what looks correct. Then save this line in a folder in your Saved Places. Even if you don’t plan to export the latitude and longitude data, these lines can still be helpful for visualizing the tile map.
Copy Lines to Guidance System
Put all your saved tile lines in a folder in your Saved/Temporary Places, then right click on the folder, select Save Place As. (If you use a guidance system that can natively import KMZ/KML files, great! That will be much more straightforward and you can skip the rest of this.) If not, and you’ll want to access the lat/long data manually, save the file as a KML.º
Open the KML file in a simple text editor like Notepad (Windows) or TextEdit (macOS). Scroll down to the second half of the file and look for lat/long pairs under a <coordinate> tag. Each <coordinate> tag contains six numbers, separated by commas, in the following order:
- Point A longitude
- Point A latitude
- Point A feet above sea level
- Point B longitude
- Point B latitude
- Point B feet above sea level
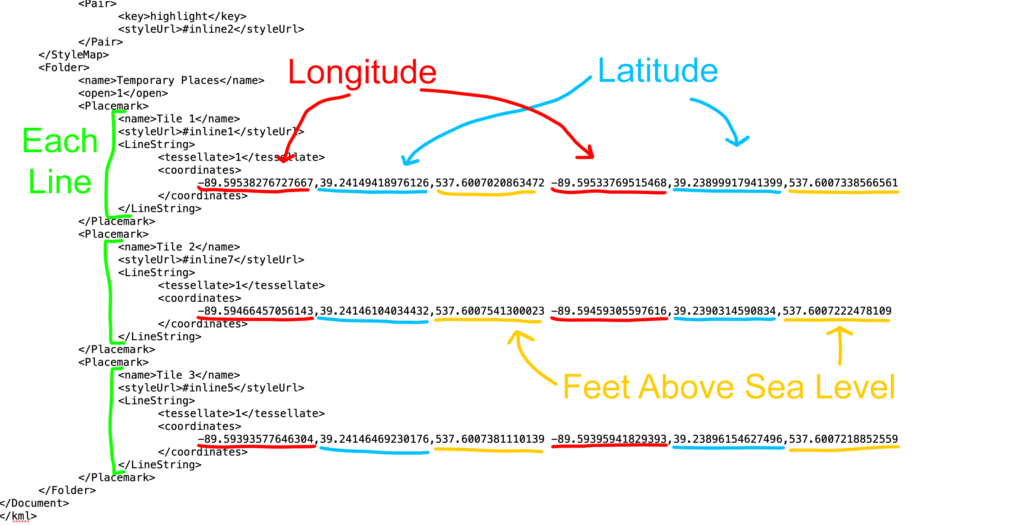
This might look intimidating, but it’s fairly liberating in a way; you can paste these lat/long points into whatever software you want or you could even key them directly into a display if you didn’t have very many.
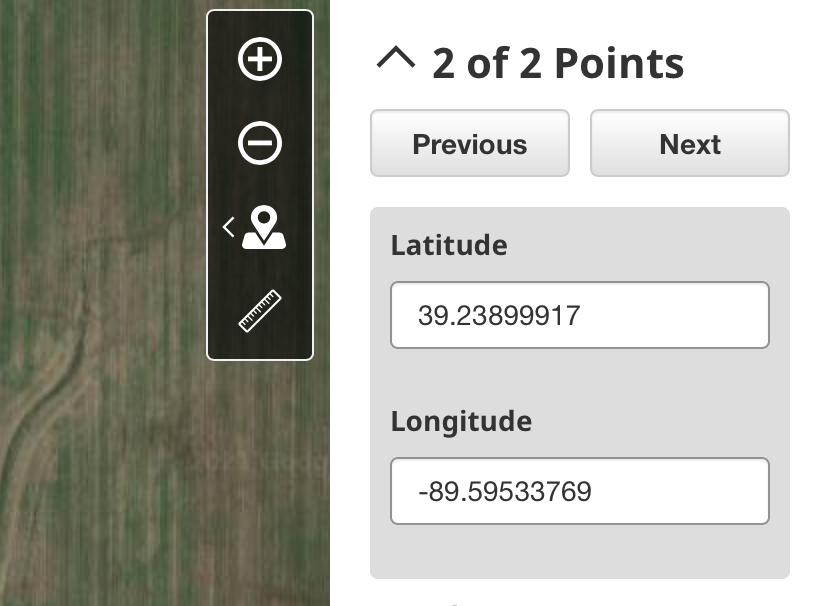
We use John Deere displays, so I created a flag (line type) in Land Manager for each of these lines, then pasted in the lat/long.
Calibrate with a Known Point
If you want to take lat/long coordinates from a satellite photo and go to them in the real world, there are at least two variables that impact the accuracy of this; 1) how accurately was the satellite photo stitched and 2) how much drift is being experienced by the receiver.
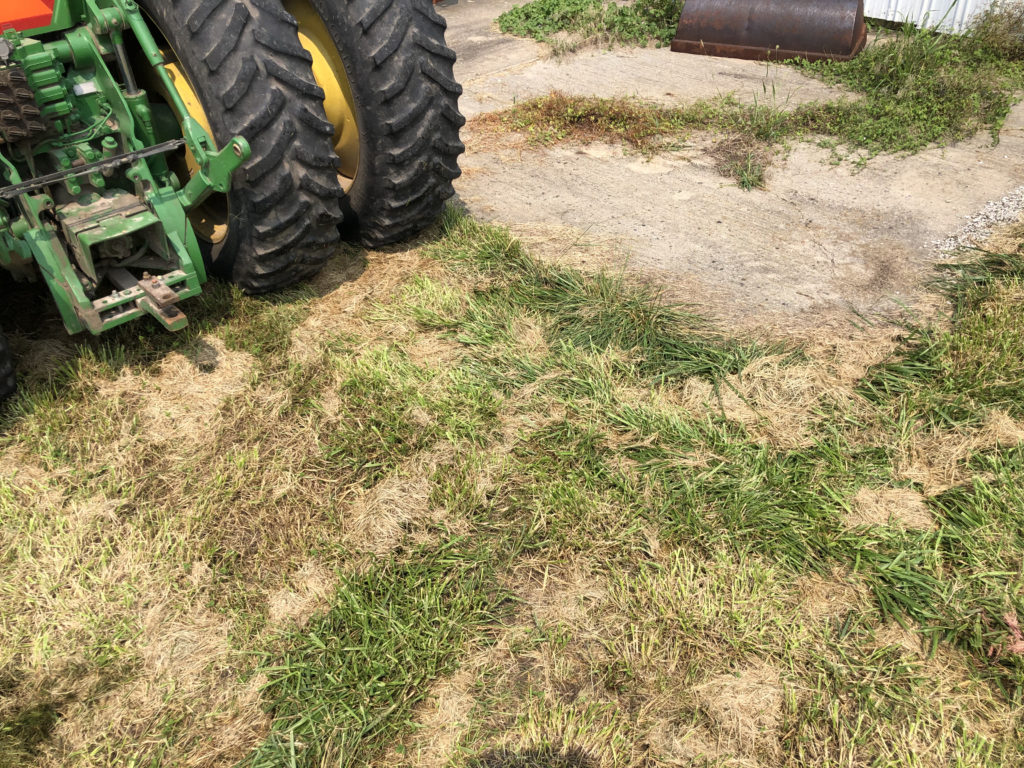
To account for this, find something nearby in the real world that appears clearly in the satellite photo and is unambiguously in the same location today.
Good candidates:
- Concrete pads, well covers, etc
- Fence posts
- Road intersections
Building corners generally wouldn’t work well because you can’t sit directly next to / atop them and still have a wide view of the sky. You also run the risk of parallax distortion depending on how much of a side view the satellite captured and how tall the building is. (Watch for this on fence posts as well).
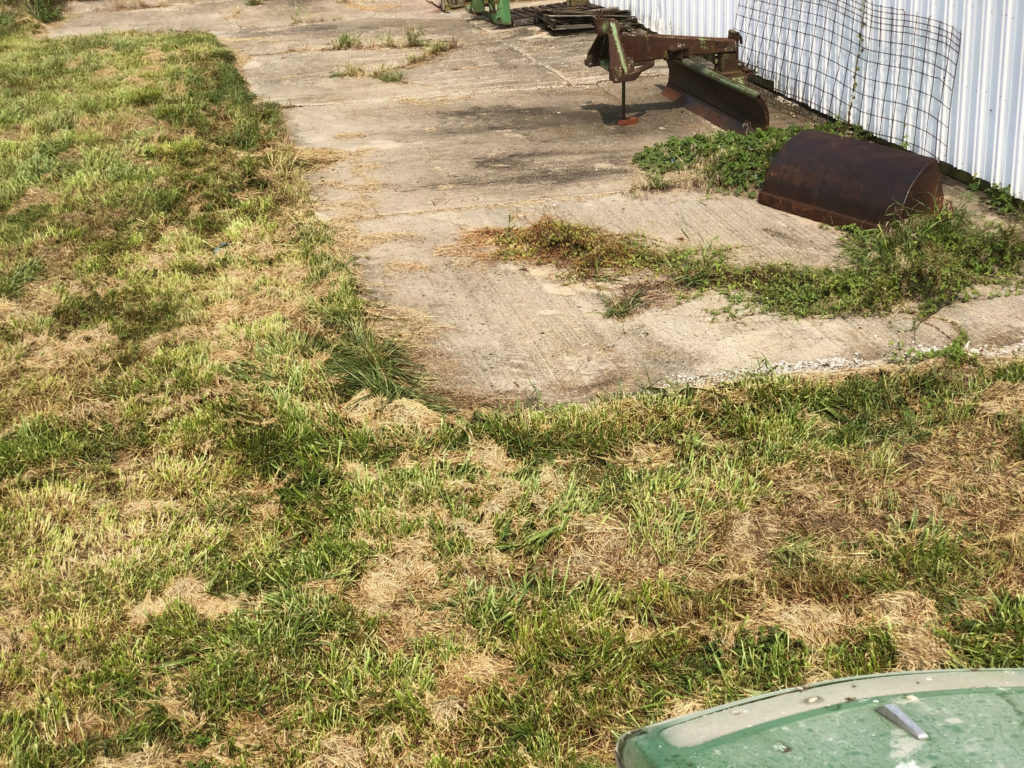
Mark this feature with lines in Google Earth using the same historical photo you used to mark the tile lines and bring those to your display as was shown earlier. Now align yourself so the drawbar on the display is at the reference point and compare your offset in the physical world.
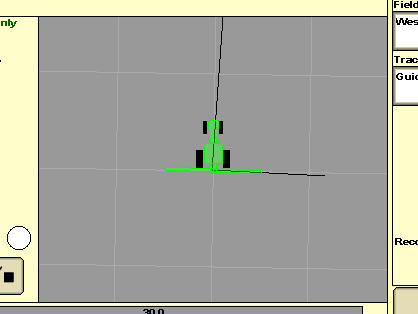
Once you know your offset, you should be able to drive to what the screen shows as correct and measure back to the true location accordingly. Depending on the temporal accuracy of your GPS corrections, you may need to do this immediately. In our case we’re just using SF1, so I went directly to the tile line after getting this offset measurement and started placing flags.
“Says the guy who couldn’t find his tile line”
As I mentioned earlier, I can’t prove that this method works because I wasn’t actually able to locate the line we were looking for. But it seems really solid in theory, and as we all know, when something works in theory, it works in practice.
Let me know if you have any luck with this method or have any better/simpler ways of locating lines.